Photography Course Lebanon

Photography Fundamentals

+Video Production Training for Social Media (optional)

Duration: 30 hours

Teaching Methodology: 15 hours in-class, 15 hours practice

Course Schedule: Schedule

Fees $350

Course Mode: Onsite Face-to-face


OBJECTIVES

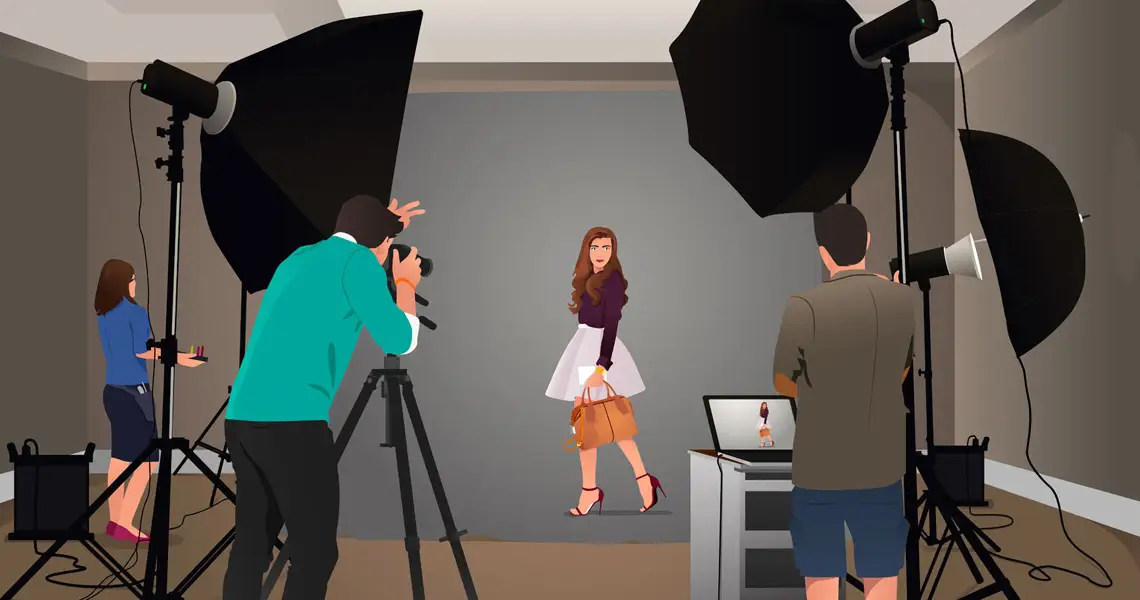
This course teaches the basics of photography and drives the students to a professional level. We use DSLR and mirrorless cameras, exposing the students to various equipment and lenses.

DESCRIPTION

This photography course teaches you about camera parts, accessories, image formats, frames, exposure, lenses, shutter speed, aperture, depth of field, light, flashlights, compositing, and image enhancement. Since most modern cameras have HD and 4K shooting capabilities, we will also learn how to capture video footage.

Using various equipment, you will learn how to photograph portraits, landscapes, sports events, weddings, and ceremonies. Check the assignments section at the bottom of the page.

If you decide to take the videography for social media option, you will learn how to film videos to create fascinating content for YouTube, TikTok, and Instagram.

Photography Course Lebanon 01
Photography Course Lebanon 02
Photography Course Lebanon 03
Photography Course Lebanon 04

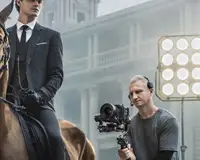
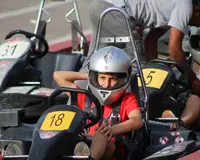
Table of Contents - Photography

Part 1 - Your Camera and Its Accessories

  1. 01. Camera parts and their functions
  2. 02. Traditional DSLR vs. Mirrorless Cameras
  3. 03. Key accessories
  4. 04. Getting to know your camera
  5. 05. Setting up your camera
  6. 06. Taking your first photos
  7. 07. Caring
  8. 08. Your safety first

Part 2 - Operating Your Camera

  1. 01. Basic photography and playback
  2. 02. Framing photographs
  3. 03. Basic settings
  4. 04. Shooting Controls
  5. 05. All modes
  6. 06. The i menu
  7. 07. Menu guide
  8. 08. Connecting your camera to a computer

Ratio Calculator


Part 3 - Theory and Practice

  1. 01. The photography golden triangle (Shutter Speed, Aperture, and ISO)
  2. 02. Exposure, Lenses, Focusing
  3. 03. Filters
  4. 04. Dynamic range
  5. 05. Controlling light through the camera
  6. 06. Depth of Field
  7. 07. Control the effect of movement
  8. 08. Night photography
  9. 09. Image enhancement
  10. 10. Compositing
  11. 11. Expressive photography
  12. 12. Introduction to artificial lights (speed lights)

Videography for Social Media (optional)

Part 1 - Settings, Capturing, and Uploading

  1. 01. About PAL, NTSC, and cinema
  2. 02. HD, 4K, and frame rate
  3. 03. File formats MOV vs. MP4
  4. 04. Video size and quality
  5. 05. Choosing a lens
  6. 06. Camera focus Settings
  7. 07. The AF mode
  8. 08. Choosing a picture style
  9. 09. The white balance
  10. 10. The shutter speed
  11. 11. Aperture
  12. 12. ISO
  13. 13. Start filming
  14. 14. Importing to Adobe Premiere or After Effects
  15. 15. Uploading to YouTube, TikTok, and Instagram

Part 2 - Using Stabilizers

  1. 01. Using DJI stabilizers
  2. 02. Balancing, calibrating, and checking the motor stiffness
  3. 03. Color indicators, green, yellow, and red
  4. 04. Locking the settings
  5. 05. Connecting to camera using bluetooth or camera control cable
  6. 06. Disabling/enabling selfies, push pan, push tilt, horizontal calibration and other modes
  7. 07. Joystick settings, dial and M button functions
  8. 08. Default position by double-clicking the trigger
  9. 09. Holding down the trigger to lock the camera position
  10. 10. The sleep mode using the power button
  11. 11. Using the M Button to lock the screen or with the trigger to stay/exit the sport mode
  12. 12. Using the sport's mode to make the gimbal respond faster to hand movements
  13. 13. The record button
  14. 14. The follow modes: Pan Follow, Pan Tilt Follow, Pan Tilt and Roll Follow, Custom
  15. 15. Using an external mic and headphone to record and monitor audio
  16. 16. Using the rabbit fur to reduce noise from wind
DJI Ronin Videography

Part 3 - Focusing While Using the Stabilizers

  1. 01. Installing the focus motor
  2. 02. The focus wheel
  3. 03. Getting focus rings from www.followfocusgears.com
  4. 04. Focus Controls
  5. 05. Making the dial control the focus motor
  6. 06. The iphone arm
  7. 07. The Raveneye image transmission

Part 4 - Film Making with the Gimbal

  1. 01. Using the gimbal with a tripod
  2. 02. Using the iphone app for fine controls
  3. 03. Pan and tilt motions
  4. 03. The ninja walk
  5. 04. Focal length
  6. 05. using the correct mode
  7. 06. Rotation of the wrist
  8. 07. Using the base as a tripod
  9. 08. The follow and the reverse follow
  10. 09. The step-in reveal
  11. 10. The mini jib reveal
  12. 11. The side track
  13. 12. The chest transition
  14. 13. The soft focus reveal
  15. 14. The wipe transition reveal
  16. 15. The orbit
  17. 16. The fake drone reveal
  18. 17. The reveal turn around
  19. 18. The character switch
  20. 19. The tracker reveal
  21. 20. The POV swing
  22. 21. The ride-in
  23. 22. The tilt-up forward push
  24. 23. The telephoto tracker

Part 5 - Light and Audio

  1. 01. Using the ring light
  2. 02. The shotgun microphone
  3. 03. The lavalier mic
  4. 04. The dynamic mic

LOGISTICS

  1. 1. A DSLR or a mirrorless camera
  2. 2. A zoom lens
  3. 3. A tripod
  4. 4. A remote control
  5. If you have not decided what to buy, ETC will provide a camera and various lenses for you to try.

OUR EQUIPMENT

Pinhole, Obscura, SLR, DSLR, and mirrorless ultra modern cameras


FREE ONLINE EXAM

Assess yourself - No password - No limit - Automatic results

Pinhole camera
Camera Obscura
DSLR Canon 550D
Mirrorless Camera Canon R6

▶ ASSIGNMENTS

Assignment 01 - Creating Your Camera Obscura

Use a box, a transparency paper, and tapes to create a camera obscura.
Bring it to class next time.

Assignment 02 - Create camera obscura with movable sensor paper

Use a potato chip can or a sheet holder. Can you make the sensor movable?

Assignment 03 - Camera Settings

Use your camera menu to set the following:
01 Format your memory card
02 Set the date and time
03 Select the language
04 Choose a video system
05 Set the LCD brightness
06 Select file formats, image size, and image quality
07 Choose a color space

Assignment 04 - Shooting and Managing Images

01 Use automatic mode to shoot some images
02 Use the flash off mode to shoot some more pictures
03 Experiment with viewing, locking, rotating, and erasing few or all images
04 Remove your memory card and use a PC to view your images
05 Use Adobe Photoshop to open RAW images as 16 bit files
06 Check image size, color space, and color settings
07 Save as PSD, TIFF, PNG, or JPEG

Assignment 05 - Depth of Field Using Cards and Dummies

Use a long space to arrange few cards as shown.
Photography depth of field exercise
Use Av mode and shoot pictures to experiment with various F-Stops and notice how they affect depth of field.
Experiment how zoom in and zoom out affect the depth of field.
If you have a telephoto lens, use it to understand how it affects depth of field.
Lock the zoom on a target card and then change the view to encompass all cards and shoot
Move close to the first card and shoot it


Assignment 06 - Depth of Field Using People

Repeat the previous exercise but using people such as your classmates or friends.

Move close to the subject that is away from the background and take a photo.
Move away from the subject and take a photo.
Place people in front and behind the subject at various distances and take a photo.
Try various lenses and F-Stops.

Assignment 07 - Preset Modes

Visit a sports event or come to ETC Dbayeh where kids play basketball.
Photography preset modes
Cleanup your lenses and charge your batteries.
Use Portrait mode to photograph the players one by one, against bright backgrounds.
Photograph them against dark backgrounds.
Zoom in on them. Zoom out. Move close to them. Move away.
Photograph them close to the background.
Move them away from the background.

Try the Close-up mode to shoot lemons, flowers, etc...
Try to shoot close-ups using the telephoto lens.

When they play, change to the Sports mode.
Try the burst mode to capture the action.
Use the wide angle lens using various focal length to cpature the scene.
Try the Landscape mode.

Use the P mode to capture the actions using low ISO.
Use the P mode to capture the actions using high ISO.
In P mode, try various F-Stops and Shutter speed by using the dial.
If it gets dark, try the night portrait mode.

Try the CA mode using various Styles, Blurring, burst modes, and Flash settings.
Open your RAW files with Adobe Photoshop and experiment with color temperature and exposure.

Assignment 08 - White Balance, Action Shots, and AF-ON

Visit a Horse Riding Club with a friend rider.
Auto Focus
Cleanup your lenses and charge your batteries.
Use a preset white balance that matches the environment.
Use a wide angle lens to capture the landscape.
Use a telephoto lens with Av mode to capture the rider mounting the horse.
Use Tv mode to capture the moving horse.
Raise the ISO mode to speed up the shutter.
Experiment with various metering modes.

Experiment with burst mode.
Experiment with different Drive modes.
Experiment with One Shot and AI Servo focusing.
Experiment with AI Servo focusing.
Experiment with AF-ON to focus on the moving horse.
Experiment with different AF modes

Open your RAW files with Adobe Photoshop and experiment with color temperature and exposure.

Assignment 09 - Night Photography

On a roof top or a wedding evening reception with low lighting try the following.
Night photography
Cleanup your lenses and charge your batteries.
Use a tripod and remote control for most of the night.
Use a white paper or large white object to set custom white balance.
Use night portrait to photograph few people.

Use a wide angle lens with night landscape preset to photograph the scene.
Use a prime lens 28mm and 50mm to capture people.
Use the built-in flash to photograph people less than 5 meters away.
Experiment increasing decreasing the flash power

Photograph actions such as dancing or moving people using Tv mode with high ISO.
Try the Manual mode.

Try shooting moving cars on the street with slow shutter speed.
Try the Bulb mode. Time how many seconds to capture a good photo of the sky, moon, stars, etc...

Open your RAW files with Adobe Photoshop and experiment with color temperature and exposure.

Assignment 10 - Photographing a Sports Event

Take a young relative cartings.
Night photography
Cleanup your lenses and charge your batteries.
Set the white balance.
Use a wide angle lens and Manual mode to cpature the scene.

Use a telephoto lens with Av mode to capture the young boy or girl getting ready.
Use a wide aperture + zoom in to capture narrow field of views.
Try small aperutre + zoom out to get sharp backgrounds.

Use the Tv mode to photograph the moving carts.
Increase the ISO to speed up the shutter speed.

Open your RAW files with Adobe Photoshop and experiment with color temperature and exposure.


Assignment 11 - Wedding Photography

The first wedding you attend, try the following:
Wedding photography
Cleanup your lenses and charge your batteries.
Take with you a 28mm and a 50mm prime lenses. Also take a zoom lens 18-135mm.
Take extra memory cards and if possible a backup camera
Set the white balance.
Indoor set the ISO to 1,000
Take photos using calibration cards
If you image colrs are tilted toward yellow, use color brackets to shift them toward blue.
Select desired focusing method.
Select a metering method. To Foucs on the bride wherever she stands, use the Spot Metering method.

Use the Manual mode to take photos with your lenses.
If the photographer is using a strobe, ask them what should be the white balance (Daylight).
Try to take photos with sharp backgrounds.
Try to take photos with blurry backgrounds.

Try exposure brackets to take multiple shots: Standard, underexposed, overexposed.
Switch to Video mode and shoot many videos.
If your camera is capable of 4K videos and 50 frames per second, use these settings to shoot your videos.

Open your RAW files with Adobe Photoshop and experiment with color temperature and exposure.
Open your video files with Adobe Premiere and create a simple sequence with few transitions.

Assignment 12 - Full Day Outdoor Photography

You are invited to spend a day at ETC farm resort.
Outdoor photography Outdoor photography Outdoor photography
Cleanup your lenses and charge your batteries.
Take all your equipment, lenses, tripods, calibration cards, etc... You may borrow lenses and tripods from your instructor.
Prepare a plan on what kind of photos you want to take.
Experiment shooting sceneries, people, and animals using various techniques.

Focus on using the Manual, Tv, and Av modes.
Shoot videos.

Open your RAW files with Adobe Photoshop and experiment with color temperature and exposure.
Open your video files with Adobe After Effects and create a simple composition.