
V-Ray Courses Lebanon – V-Ray for Architects Training
Learn to create stunning, photorealistic renderings with V-ray in Lebanon. This hands-on course teaches architects and designers how to master lighting, materials, and rendering for both interiors and exteriors.
Duration: 20 hours
Teaching Methodology: Hands on
Course Schedule: Schedule
Fees $300
Course Mode: Blended Face-to-face or online via Zoom
DESCRIPTION
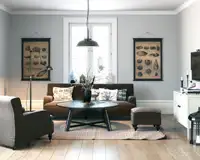
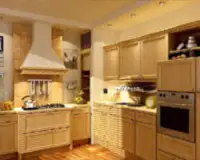
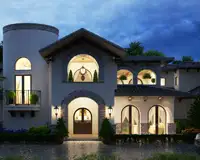
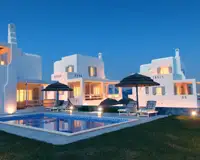
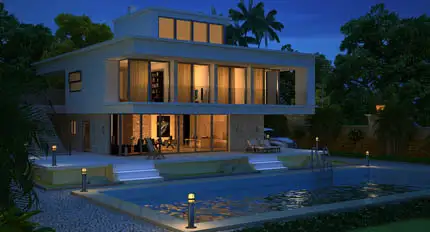
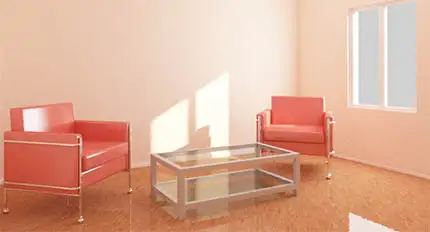
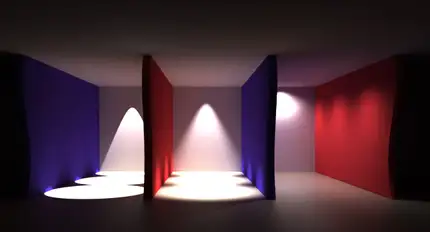
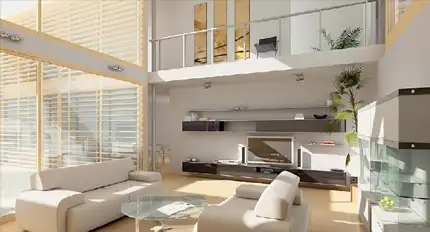
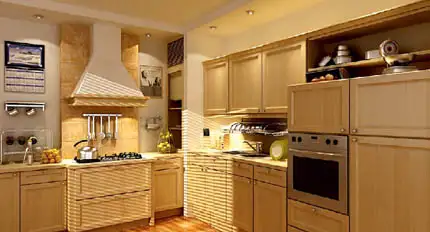
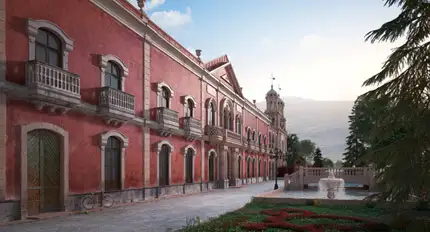
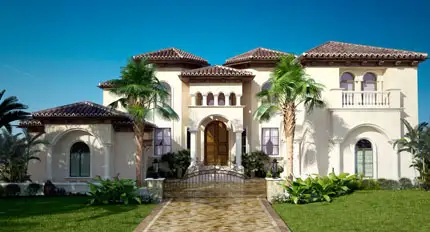
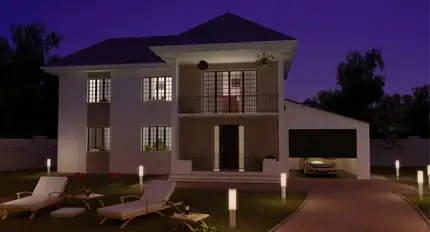
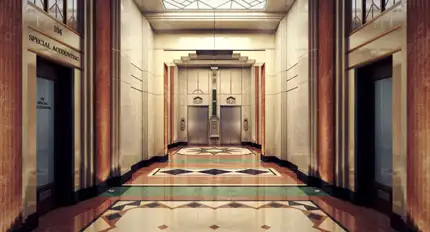
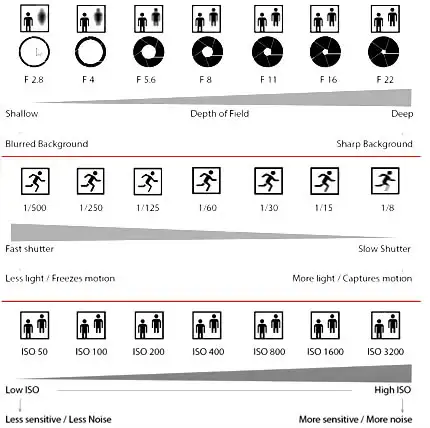
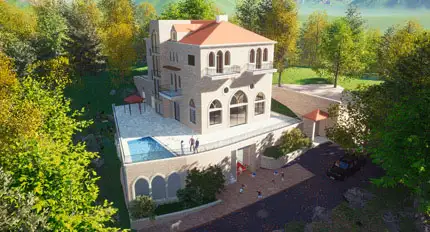
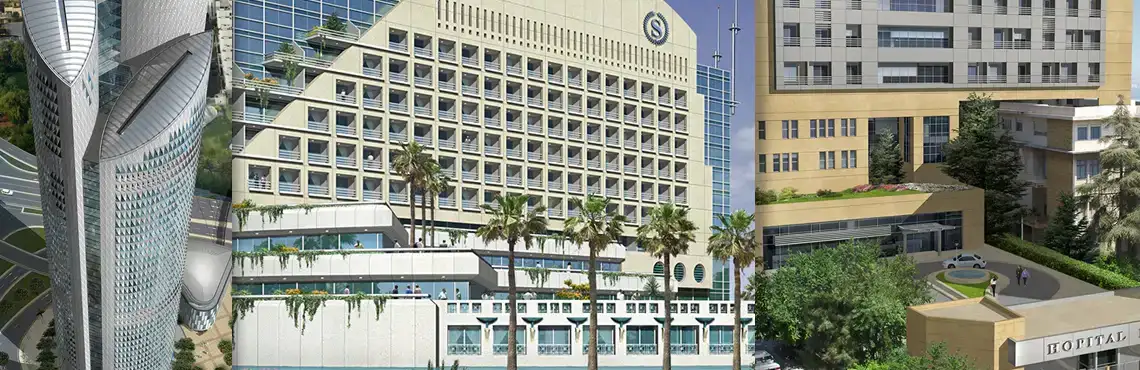
Tailored for architects and interior designers, this V-ray course delves into the art of rendering both exterior and interior scenes. Explore the intricacies of V-ray, mastering essential aspects such as lighting techniques, materials, render settings, physical cameras, and render elements. Acquire the skills needed to transform your design concepts into stunning, photorealistic visualizations.
OBJECTIVES
Our students will become proficient in using this plugin to produce stunning and highly realistic 3D exterior and interior visualizations.
Topics Covered:
The V-ray Frame Buffer
Global Switches
Image Sampler
Image Filter
Environments
HDRIs
V-ray Lights
V-ray Sun
Color Mapping
Gamma Correction
Global Illumination
Settings
Render Elements and Adobe Photoshop
The V-ray Physical Camera
V-ray Objects
V-ray Materials
Unwrap UVW
Archiving
AUDIENCE
Architects, interior designers, decorators, graphic designers, artists, animators, TV graphic designers, art directors, and anyone interested in creating 3D presentations.
PREREQUISITES
3DS Max 1 for Architects and Interior Designers and Adobe Photoshop
Free 3DS Max Online Exam
Use our free online 3DS Max exam to assess your skills. You may select particular categories. There is no password or limit on how many times you can take it. When you hit the Finish button, the system will post the results on the screen and send a copy to your email.


COURSE CONTENTS
01 - Introduction to V-Ray
- Making V-Ray the render engine
- Making V-Ray the Default Renderer
- Global switches: Advanced
- Default Lights, Environment, the V-Ray Frame Buffer
- Settings: Frame Stamp
- Image Sampler: Progressive, Bucket
- Global Illumination
- Primary and secondary bounces
- The Environment Rollout
- Adding a Direct Omni Light, V-Ray Shadow
- Introduction to Color Mapping to Control High and Low Color Values
- Introduction to V-Ray Materials, Presets, Reflect, Fresnel Reflections
- Show Last VFB, Saving, Opening in Photoshop
- Download Lesson 01
02 - The Basics
- The V-Ray toolbar
- Enabling the V-Ray frame buffer
- Irradiance Map and Brute Force
- Show Samples, Subdivs, Interpolation Samples
- Ambient Occlusion
- Using Gradient Ramp for Environment
- Progressive Image Sampler, Time Limit
- Bucket Mode
- Using Omni direct light to add V-Ray shadows
- Introduction to Color Mapping
- Introduction to V-Ray Materials
- V-Ray Elements, Add VrayDenoiser
- The V-ray Frame Buffer Layers Panel
- Render Setup, Common, Area to render: Region
- Gamma Correction for Correct Output
- Download Lesson 02
03 - Rendering an Exterior Overpass Scene
- Enable Gamma, Render Setup
- Reviewing Indirect Illumination
- Gradient Ramp as GI environment or Scene Environment
- Replacing the Gradient Ramp with the V-rayBitmap Sky (HDRI-Spherical)
- Scene Environment, Views: Viewport Background, Adjusting the Sky
- Adding V-Ray Light - Sphere
- Help on VraySun
- Replacing the V-Ray light with the V-Ray Sun
- Color Mapping: HSV Exponential, Color Mapping and Gamma
- Replacing the HDRI Sky with Vraysky, the Sun Z Elevation
- Help on V-ray Lights, Plane, Disc, and Sphere
- Rendering at higher quality, Resolution
- Vraymtl with Reflection
- VFB Options: Settings, History
- VrayDenoiser
- Download Lesson 03
- Download HDRI Skies
04 - Rendering an Exterior Scene: Building
- Importing the AutoCAD File
- Units Setup, Import, Enable Gamma
- Initializing V-Ray
- Add a VRayCamera
- Adding a Daylight System
- Replacing the sun with the VRaySun
- VRay Exposure Control
- Adding a VRaySky Manually
- Using V-Ray Material Using Presets
- Using Standard Max Material then Converting It to V-Ray
- Using the V-Ray Frame Buffer
- Creating Sunset Scene
- Rendering Using High-Quality Settings, Bucket Mode
- Download Lesson 04
05 - Rendering an Exterior Scene: Villa
- Importing the File Villa
- Creating the Road and Applying Material
- Creating the Pavement
- Vray Rendering and Setup
- Creating Realistic Grass with Vray fur
- Adding Entourage
- Customize: Configure Project Paths
- Render
- Download Lesson 05
06 - Rendering an Exterior Night Scene
- Open the File Chalet NirvanaWithPlants
- Rendering: Material Explorer
- Environment
- Add VRaySun
- Using VRay Dome Light to Project an HDRI
- Afternoon Scene
- Creating a Night Scene
- VRay Disc Lights
- Adding IES Lights, Disc Lights, Wall Mount Lights
- Lens Effects
- VFB Add the Layer Lens Effects, Enable bloom/glare
- Color Mapping Reinhard or Linear Multiply
- Download Lesson 06
- Download IES Lights
07 - Rendering an Interior Scene
- Open the File Model_start.max, Enable Gamma
- Color Mapping
- Exposure Control
- Indirect Illumination
- Using the VRayMtlWrapper
- Direct Lights, Vray Sun
- Help On VRay Sun
- Apply Material to the Sofas and the table
- Adding Carpet and Carpet Material
- God Rays
- Download Lesson 07
08 - Using Various Lights with V-Ray
- Standard Lights and Light Cache
- Photometric Lights/IES
- V-Ray Plane Lights
- V-Ray Disc Lights - Planar Disc
- V-Ray Mesh Light - Any Mesh as Light
- V-Ray Ambient Lights to Simulate GI
- Objects as Light Sources
- Turning Off Default Lights
- Creating a Light Using a Cone and a Photometric Light
- Download Lesson 08
09 - Libraries/Settings/Material Explorer
- Importing Materials and Objects from Other V-Ray Files
- Importing Lights from Other V-Ray Files
- Importing Settings from Other V-Ray Files
- Importing all the Materials from a V-Ray File
- Download Lesson 09
11 - Global Switches, IPR, and Proxies
- Global Switches
- IPR/Interactive Production Rendering
- Using Proxies to Reduce Workload on Viewports
- Import a Tree, 7, Isolate, Attach List, Right-click: V-Ray Mesh Export, Check Automatically Create Proxies
- Select Tree, Modify Tab, Proxy Parameters, Display Options, 7, Render
- Import as Mesh to Import the Full Mesh as a Copy
- Download Lesson 11
12 - Learning by Examples
- Exterior Scenes
- Interior Scenes
- Download Lesson 12
- Download Lesson 12 Living Room 430MB
13 - Materials
- V-Ray Material Library
- Create New VrayMTL
- Floor Material
- VRayDirt Map
- VRayTriplanarTex
- Help on VRayTryplanarTex Map
- Help on VRayUVWRandomizer Map
- VRayUVW Randomizer
- VRayEdgeTex Map
- Help on VRayEdgesTex
- Composite and Falloff
- Help on 3DS Max Composite Material
- Help on 3DS Max Mix Map
- Mix map
- Help on Vray Blend Material
- Help on 3DS Max Falloff Map
- Falloff Map
- Help on 3DS Max Noise
- Help on 3DS Max Output Map
- Silver, Gold, Chrome, Metal Weathered, VRay Material Library
- Help on Glossy Fresnel
- Carpet Material
- Help on VRay Displacement Mode
- Emissive
- Water
- Fabric
- Download Lesson 13
14 - Unwrap UVW
- Autodesk Help - Edit UVWs Dialogue Rollouts
- UVW Mapping Clear
- UV Editor
- Flatten Mapping
- Unfold
- Download Lesson 14
15 - Render Elements
- Render Elements to Break Image Into Components
- Render Elements Help
- The VRayRGB_color
- VRayDenoiser, VRayVFB, Preset Strong
- Save Channels as Separate Files
- Help on VRayDenoiser
- ExtraTex With TexDirt Map, See Steps Below
- Help on VRayExtraTex
- VRayExtraTex Element and VRayDirt Map
- VRaySpecular
- Help on VRaySpecular
- VRayDiffuseFilter
- Help on VRayDiffuseFilter
- VRayIlluminance
- VRayReflection
- Help on VRayReflection
- VRayRefraction
- VRayShadows
- Help on VRayShadow
- VRayRawShadow
- Help on VRayShadow
- VRayGlobalIllumination
- Help on VRayGlobalIllumination
- VRayLighting
- Help on VRayLighting
- VRayLightSelect
- Help on VRayLightSelect
- VRayMTLID
- VRayObjectID
- VRayObjectSelect
- VRayWireColor
- Help on VRayWireColor
- VRayAlpha
- VRayLightMix
- Help on VRay Lightmix
- How to Use VRay Lightmix
- VRayZdepth
- Help on VRay Z Depth
- Download Lesson 15 - Interior 87MB
- Download Lesson 15 - Exterior 19MB
- Download Lesson 15 - Lobby 69MB
- Download Lesson 15 - Waiting Room 340MB
16 - Physical Camera
- Using the VRay Physical Camera
- Help on VrayPhysical Camera
- Camera Controls Bottom Right Corner
- Camera Properties
- The Camera Rollout to Control How the Geometry Is Projected Onto Image
- The Camera Rollout Is Ignored If You Are Using a Physical Camera
- Download Lesson 16 324MB