3DS Max main image

3DS Max for Architects and Interior Designers

Duration: 36 hours

Teaching Methodology: Hands on

Course Schedule: Schedule

Fees $300

Course Mode: Blended Face-to-face or online via Zoom


OVERVIEW

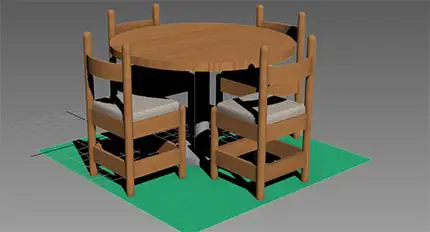
This 3DS Max course teaches you to create architectural models from scratch and based on AutoCAD 2D drawings, apply the material, add lights and cameras, render still images, and animate architectural or interior scenes. We also train participants to model complex architecture models.

OBJECTIVES

In this course, participants learn how to:

  • Use the Interface
  • Use Selection and Transformation Tools
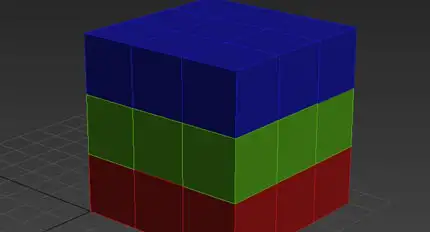
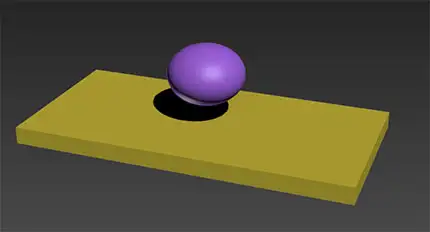
  • Create and Modify Mesh Objects
  • Create and Modify Poly Objects
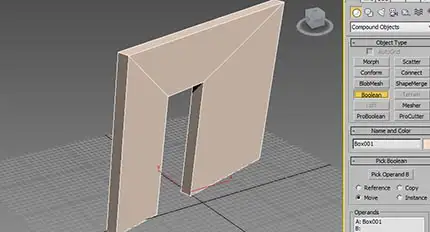
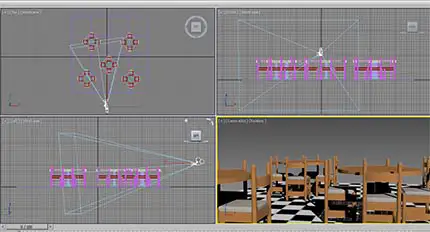
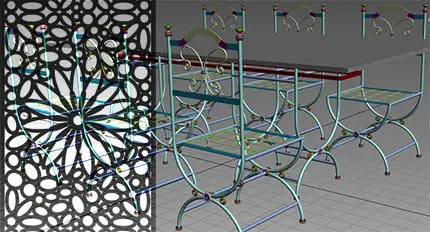
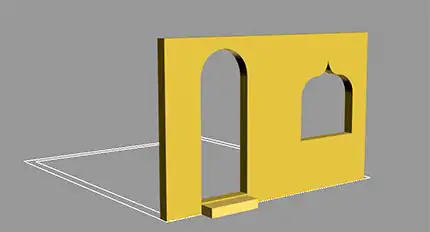
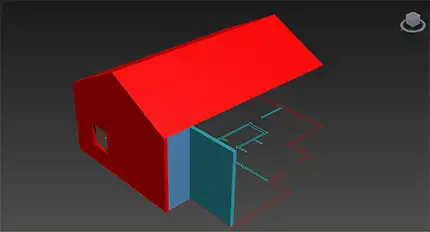
  • Create Complex Architectural Objects
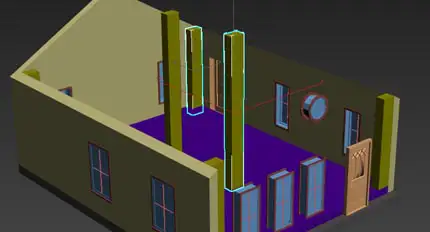
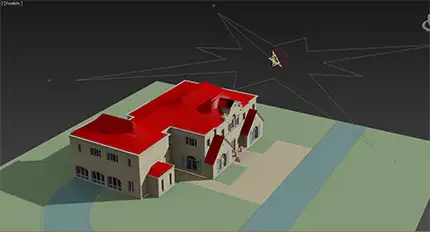
  • Import AutoCAD 2D Files and Model in Max
  • Organize AutoCAD Files Using Layers and Plines
  • Import Plines from AutoCAD Files to Create 3D Objects in Max
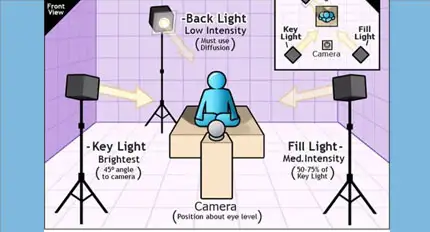
  • Use Standard Lights
  • Create a Night View Using Photometric Lights
  • Create Daylight Systems
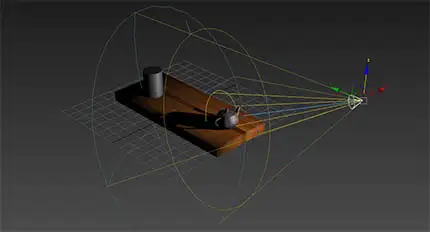
  • Add and Modify Cameras
  • Create a Basic Animation
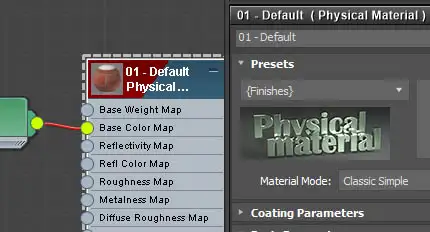
  • Create, Get, Modify, and Save Materials
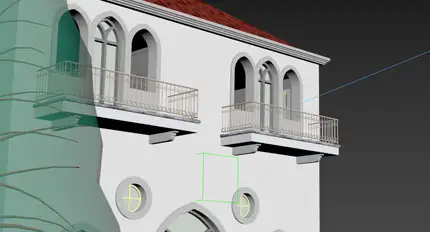
  • Import a 3D Hut from AutoCAD to Assign Materials, Add Backgrounds, and Render
  • Walkthroughs and Camera Movements

AUDIENCE

Architects, interior designers, decorators, graphic designers, artists, animators, TV graphic designers, art directors, and anyone interested in creating 3D presentations. This course provides the base knowledge for higher-level courses such as V-Ray, Max Modeling, Max Animation, Lighting, Lumion, etc.

PREREQUISITES

AutoCAD 2D and Photoshop are essentials if you want to gain proficiency in architectural modeling and rendering. During this course, you will use readymade AutoCAD files to model in Max. You may learn AutoCAD 2D and Photoshop in parallel with this course or later on.

Free 3DS Max Online Exam

Use our Free 3DS Max Online Exam to assess your skills. You may select particular categories. There is no password or limit on how many times you can take it. When you hit the Finish button, the system will post the results on the screen and send a copy to your email.

3DS Max 01
3DS Max 02
3DS Max 03
3DS Max 04

COURSE CONTENTS

01 - The Interface

  • Customize: Custom Defaults Switcher - Max.Legacy
  • The Default Workspace, Manage Workspaces, Reset To Default State
  • Customize: Units Setup
  • The Command and Modify Panels
  • Viewports, View Cube, The Zoom Panel
  • The Viewport Menus,
  • Import CAD, Right Click Menu
  • Autodesk Help - Walkthrough Navigation
  • Omni Lights, the Move Tool, Skylight
  • Safe Frames, Rendering Setup,Render
  • Undo/Redo
  • Customize: Configure Project Paths - External Files
  • Adding Maps and Using the 3dsmax.mat Library
  • Applying Materials, Introduction to UVW Map, Length Width and Height
  • Download Lesson 01
  • Download Standard Maps and Materials
The Interface

02 - Selection and Transformation Tools

  • Tools: Scene Explorer
  • Drawing Objects and Adding Omni Lights
  • Using the Explorer to Select, Hide/Display, and Freeze/Thaw Objects
  • Selecting/Deselecting Multiple Objects, SHIFT or CTRL, ALT
  • Customize: Preferences - Window/Crossing
  • The Bounding Box, Views: Active Viewport Settings - Preferences
  • Selecting, Naming, H, Filters
  • The Transformation Tools
  • About Pivots
  • View and Local Coordinate Systems
  • Open the Puzzle Cube
  • Snaps
  • Precision 3 Decimals
  • Selection Sets
  • Manage Selection Sets
  • Download Lesson 02
Selection and Transformation Tools

03 - Mirroring, Aligning, Grouping, and Cloning Objects

  • Mirroring Objects
  • Aligning Positions
  • Drawing Objects Using AutoGrid
  • Normal Align
  • Group: Group, Ungroup, Open, Attach, Detach, Close, Explode
  • Cloning, Make Unique
  • Tools: Array
  • The Quad Menu, Isolate, Hide, Transform, Clone
  • Experimenting With CAD File from Lesson01
  • Download Lesson 03
Mirroring, Aligning, Grouping, and Cloning Objects

04 - Creating Precise Basic Architectural Objects

  • Creating Simple Walls and Doors
  • Aligning Doors with Walls
  • Lock Selection, SPACEBAR
  • Moving Doors Using Local Axis
  • Create: Objects, Compound Objects, Boolean
  • Creating Openings Using Boolean
  • Using the Modify Panel to Edit Boolean Objects
  • Modeling a Fire Hydrant (Basic)
  • Download Lesson 04
Creating Precise Basic Architectural Objects

05 - Creating a Restaurant Scene

  • Units, Grids, and Snaps
  • Modeling a Chair
  • Monitoring Statistics
  • Keeping Polygon Count Under Control, 7
  • Assigning Materials to the Chair Components
  • Grouping the Chair
  • Creating Three Additional Chairs Using Rotate and Mirror
  • -----------------------------------
  • Modeling a Table
  • The Material Editor, M
  • Modes: Compact Material Editor
  • Assigning Materials to the Table
  • Using the UVW to Correct Material Display
  • Grouping the Table
  • Placing the Table in the Center
  • Grouping the Table Set
  • -----------------------------------
  • Using Plane to Create the Floor
  • Assigning Checker Material to the Floor
  • Creating the Walls Using C-Ext
  • Assigning Bricks_Yellow Material to the Walls
  • Using UVW Box Map to Correct the Wall Material
  • Creating Roof and Assigning Material
  • Importing Objects from the www.bimobject.com Such as the Parco Table
  • Download Lesson 05
Creating a Restaurant Scene

06 - Introduction to Lighting, Cameras, and Animation

  • Creating an Omni Light
  • Activating Shadows
  • Adding a Skylight
  • Adding a Camera
  • Using Multiple Viewports to Position the Camera
  • Rendering Still Images, Area to Render, Output Size, Show Safe Frames
  • Render Output, TIF Vs. JPEG
  • -----------------------------------
  • Animating the Camera Movement
  • Introduction to Keyframes
  • Editing Keyframes
  • Rendering the Animation
  • Creating AVI or Quick Time Movie Files
  • Creating TGA Sequence of Images
  • Viewing Sequences Using Rendering: Compare Media in RAM Player
  • Download Lesson 06
Introduction to Lighting, Cameras, and Animation

07 - Introduction to Mesh Objects

  • Primitive Objects
  • Converting Primitives to Mesh Objects
  • Modifying Mesh Objects: Vertex, Edge, Face, and Polygon
  • Meshsmooth
  • Stacks
  • Soft Selection
  • Modeling a Boat Anchor
  • Modeling a Candy Cane
  • Using the FFD 4x4x4, the FFD 3x3x3, and the FFD 2x2x2 to Modify Objects
  • Light Bulb
  • Modeling an Umbrella
  • Download Lesson 07
Introduction to Mesh Objects

08 - Modeling Using Mesh Objects

  • Creating and Animating a Logo Using Text Shape, Extrude, and the FFD 4x4x4 Modifier
  • Textplus
  • Creating a Pool
  • Box, to Mesh, Shell
  • Water, Plane, Ripple, Wave
  • Slicing a Teapot
  • Designing Iron Plates, C Ext, Clone, to Mesh, Attach, Vertices, FFD 2x2x2
  • Download Lesson 08
Modeling Using Mesh Objects

09 - Poly Objects

  • Difference Between Mesh Objects and Poly Objects
  • Soft Selection, Plane, to Poly, CTRL M, Vertes, Falloff, Pinch, Bubble, Lock
  • Use a Sphere to Create a Bullet
  • Edit Vertices
  • Autodesk Help - Edit Vertex
  • Edit Edges
  • Autodesk Help - Edit Edge
  • Edit Polygons
  • Autodesk Help - Edit Polygon/Border
  • Edit Geometry
  • Polygon Material IDs
  • Smoothing Groups
  • Subdivision Surface
  • Subdivisions Displacement, Plane, Apply First a Displacement Map
  • Paint Deformation
  • ---------------------- PRACTICE -----------------------------
  • Creating a Light Pole
  • Creating Pillow, Cushions, Sofas
  • Table Cloth, Stairs
  • NURBS Modeling, Using Rhino to Create Complex Curvy Objects
  • Rhino Architectural Samples
  • Download Lesson 09
Poly Objects

10 - Shapes

  • Shape Objects
  • Editing Shape Objects
  • Interpolation
  • Creating a Wrench
  • Creating a Flower
  • Creating a Gear
  • Linking Objects
  • Creating a Cup
  • Creating a Bottle
  • Creating a Metal Rod
  • Fascia, Cornice, Modeling a Curtain
  • Roads
  • Download Lesson 10
Shapes

11 - Using Shapes to Create 3D Objects

  • Creating a Column
  • Creating an Arch
  • Wall With Starburst Window
  • Wall With Arched Window
  • Path Deform Binding to Create Decorative Plaster
  • Key Stone Arch
  • Stone Garden Arch
  • Complex Arches
  • Stone Window, Experiment with Sweep, to Poly, SHIFT Drag Border
  • Complex Columns Using Loft
  • Download Lesson 11
Using Shapes to Create 3D Objects

12 - Creating a Wrought Iron Dining Table, Fire Hydrant, Mousharabieh

Creating a Wrought Iron Dining Table

13 - Importing 2D Plans from AutoCAD and Modeling in 3DS Max

  • Importing a 2D Plan from AutoCAD
  • Pressing X to search for the Tape Measure command
  • Using the Tape Tool to Measure Distances
  • Using Shapes to Create the Side Wall and the Window
  • Creating the Front Wall
  • Importing and Attaching AutoCAD Polylines
  • Creating the Roof
  • Using AutoCAD Polylines and Other Techniques to Model a House in 3ds Max.
  • Download Lesson 13
Importing 2D Plans  from AutoCAD and Modeling in 3DS Max

14 - Importing AutoCAD Polylines to Model a House in 3DS Max

  • Opening the File in AutoCAD
  • Organizing Shapes Into Layers
  • Using the Polyline Command to Create Shapes to Be Used in 3DS Max
  • Importing the AutoCAD File Layer by Layer
  • Using Imported Polylines to Create Architectural Objects
  • Download Lesson 14
Importing AutoCAD Polylines to Model a House in 3DS Max

15 - Introduction to Animation

  • Creating the Table and the Ball
  • Configuring Time
  • Animating the Bouncing Ball
  • Using Keyframes to Control Speed
  • The Motion Panel
  • Animating the Table Rotation
  • Download Lesson 15
Introduction to Animation

16 - Standard Lights

  • Using Target Spotlights
  • Spotlight Properties
  • SHIFT $
  • Free Spotlights
  • Target Direct Lights
  • Free Direct Lights
  • Omni Lights
  • Skylights
  • Download Lesson 16
Standard Lights

17 - Three-point Lighting Using Photometric Lights

The Standard Lighting System

18 - The Daylight System

  • Custom Defaults Switcher - New Interface
  • Art Renderer - Set as Default
  • Unit Setup - CM
  • Import CAD File
  • Photometric - Sun Positioner
  • Physical Camera Exposure Control
  • Setting True North
  • Location Data
  • Date and Time Data
  • Change Sun Time to Change Light Intensity
  • Animating the Sun Light from Sunrise to Sunset
  • Saving the Animated Scene
  • Introduction to Physical Camera
  • Render Single Frame
  • Environment Skies - See You in the Vray Course
  • Download Lesson 18
The Daylight System

19 - Night View

Night View

20 - 3DS Max Materials

  • Custom Defaults Switcher - New Interface
  • Art Renderer as Default
  • The Compact Material Editor
  • Physical Material Classic Advanced
  • Base Color, Reflection, Metalness, Roughness, IOR
  • Bitmaps as Base and Bump Maps
  • Using Adobe Photoshop to Create Diffuse and Bump Bitmaps
  • Creating Seamless Material
  • Difference Between Get and Create New Material
  • Material Library Stocks
  • -----------------------------------
  • The Slate Material Editor
  • Bitmaps, Base, Bitmaps, Color Correction
  • Sample Slots, Presets
  • The Autodesk Material Library Installed with the Software
  • Scene Converter to Convert Legacy Material, Rendering: Scene Converter
  • Download Physical Material Libraries
  • Download Materials from textures.com
  • Download Physical Material Library from ETC
  • Download Lesson 20
Standard Material

21 - UVW Maps/Unwrap UVW

  • UVW Mapping to Apply Mapping Coordinates to an Object
  • Planar, Cylindrical, Spherical, Box
  • Material Map: Use Real-World Scale, Assign Map Scale in CM
  • Unwrap UVW to Assign Textures to Objects and Sub-Objects
  • Tools: Render UVW Template to Export Texture Coordinates to Photoshop
  • Opening in Photoshop the Template as a Guide to Paint Texture On a Separate Layer
  • Using Google to Search for Images of Unfolded Cubes
  • Preparing a Material with Diffuse Map maps\uvwunwrap\uv_checker.png
  • Texturing an Arch, Open the Arch File
  • Download Lesson 21
UVW Maps

22 - Rendering a Hut Imported from AutoCAD

  • Importing the Hut from AutoCAD
  • Assigning Wall Faces IDs
  • Applying Multisub-object Material to the Walls
  • Applying UVW Material to the Walls
  • Bitmap Map Channel
  • -----------------------------------
  • Applying Material to Roof
  • Unwrap UVW
  • Applying Material to the Door
  • Changing the Door's Pivot
  • Applying Material to the Windows
  • Force Two-Sided (If Using Scanline), Flip Normals, and 2-Sided Material
  • Adding Ground, Scaling the Plane, Trees, Sky Using a Plane, and a camera
  • -----------------------------------
  • Introduction to HDRI, Adding Photometric Sun Positioner, Daylight System Does Not Work
  • Logarithmic Exposure Control
  • Calculating Rendering Resolution Using the Print Size Assistant
  • Show Safe Frame
  • The ART Renderer Tab to Control the Quality
  • Rendering and Exporting to Adobe Photoshop
  • Linking Revit Files
  • Download Lesson 22
Rendering a Hut Imported from AutoCAD

23 - Rendering a Large House Imported from AutoCAD

  • Units Setup
  • Importing the House from AutoCAD
  • Walls, Multisub-object Material
  • Assigning Red Roof Material to the Roof Downloaded from textures.com
  • Unwrap UVW to Apply Material to the Roof
  • Archs, Stairs, Pavement, Road, Grass
  • Adding Trees and Cars
  • Using Populate to Simulate Walking People
  • Adding Photometric Sun Position and Sky Environment
  • Rendering: Exposure Control, Physical Camera
  • Rendering to TIFF File 16 bits + Store Alpha
  • Opening the File in Photoshop and Using the Alpha Channel to Paste the Sky Into It
  • Photometric Lights
  • Adjusting the Camera Settings
  • ART Tab: Rendering High Quality, Advanced Path Tracing, Enable Noise Filtering
  • Set Time Limit, Proper Image Resolution
  • Saving as PNG 48 Bits and Using Photoshop to Replace the Background
  • Download Lesson 23
Rendering a Large House Imported from AutoCAD

24 - Linking Revit Files and Creating Animations

  • Use the Same File from the Previous Lesson
  • Drawing the Camera Path
  • The Walkthrough Assistant
  • Editing the Path, Increasing Steps, Spline Relax, Normalize Spline
  • Time Configuration, Re-scale Time
  • Animating the Camera, Easy Ease the Keyframes
  • The Dope Sheet, Z Rotation, Click Keys Buttons to See Curve, Control the Speed
  • Rendering the Animation
  • -----------------------------------
  • Linking the Revit File Or Importing the CAD File
  • Camera Movements, Add New Cameras or Review Completed Max File
  • 1. Zoom, Animating the FOV, Right-click Ruler: Filter, Zoom FOV
  • 2. Pan
  • 3. Tilt
  • 4. Dolly
  • 5. Truck
  • 6. Pedestial
  • 7. Jib/Crane
  • 8. Orbit
  • 9. Tilt
  • To Adobe Premiere or Adobe After Effects
  • Download Lesson 24
Walkthroughs